
How To Install A Bathroom Vanity Top
Published: · Modified: by
How to replace and install a new vanity top on a budget. A handy tutorial for saving money on your bathroom remodel.
My family has been diligently working on bathroom remodel #5! We've learned more than a few valuable tricks while in the DIY bathroom renovation trenches. For instance, one of the best money savers is choosing not to replace the entire vanity. We've saved thousands doing it this way!
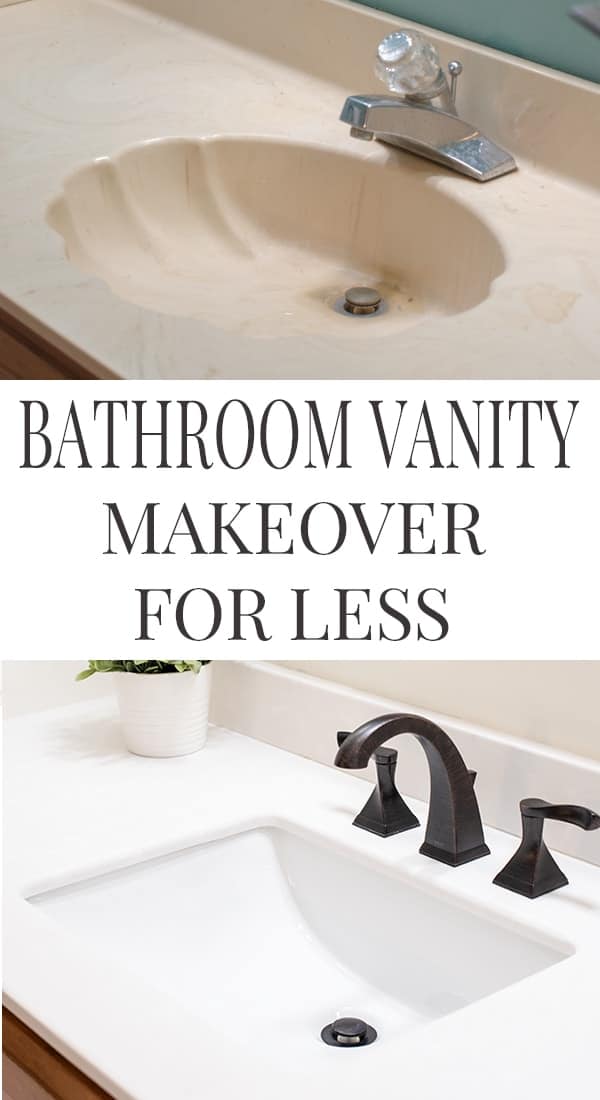
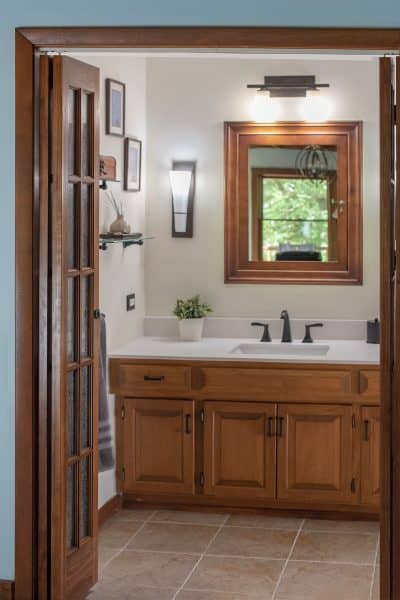
Today I'm sharing how to find a custom vanity top on a budget to help inspire your low cost bathroom remodel. This hideous 1982 seashell counter pictured below needed a modern update. You can almost hear its pleas for help. Naturally, we heeded the call.

There's a few ways to purchase a vanity top. Some big box stores now manufacture pre-made vanity tops in widths of 31-49 inches. I believe you can also buy a double sink to measure 60 inches. This by far is your most budget friendly option.
However, what if you have a vanity isn't one of these prefabricated lengths? In this particular bathroom update, we needed to replace a 59 ½ inch wide vanity top with a single sink insert. Thus, we required a custom vanity top. After calling some higher end home material stores I had a list of quotes starting around $1000 or more!
Thankfully, I had a great trick up my sleeve. One that I have now used in 3 bathroom remodels and counting.
How To Order An Affordable Custom Vanity Top
I've ordered and picked up all of our custom vanity tops from Lowe's. I didn't have luck finding this option at Home Depot or the other big box stores, but feel free to shop around and do your own research.
1. Measure your countertop space.
Accurate measurements are key to this project. You need to measure the width and depth of the vanity top. You also need measurements for the center of the sink (from the sides and back). In some stores there is an option for a contractor to measure for you. But be mindful that this may incur an extraneous charge.
2. Design Your Countertop
Before ordering, you have several design choices and decisions to make. Many of these choices come with an additional up-charge ranging from $50-100.
- Countertop Material– Cultured Marble is generally the cheapest, but there are several price grades depending on which type of marble you select. It's very similar to the way kitchen countertops are rated A,B,C,D. Each letter has a different price point.
- Matte or Gloss Finish – Matte finish generally costs around $50 more.
- Type of Faucet- (8 inch wide centerset, 4 inch centerset, single hole, or wall mount)
- Type of sink – Integral (made of the same material as the counter), or Non-integral (they mount a porcelain sink to the underside of the countertop). There is an upcharge for the non-integral, but it's more durable and harder to scratch in my opinion.
- Sink Bowl Shape – square, rectangle, or round.
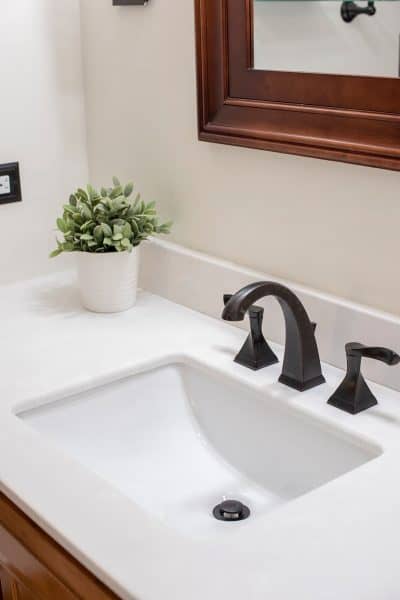
- Backsplash lip – You can choose between an attached 4-inch lip (pictured in the before photos) or an unattached one (pictured in the after photos). The choice is yours, but if you have walls that aren't parallel with the vanity top, I would recommend an unattached lip. You can hide that flaw much easier. If you're planning to add tile around the vanity, skip the backsplash lip entirely.
- Other customizations – Sometimes, you have the option to choose a specific edge or thicker front to simulate granite.
3. Tips for Ordering a custom vanity top
I'm going to be brutally honest here. The process is super easy, but there's also no need to take any chances.
I've always ordered from the bathroom department at Lowes's. That being said, I also know exactly what I'm looking for. If this is your first time placing an order- I highly recommend that you seek the help of the one employee in that department who knows what's going on.
If you've ever asked questions in a home improvement store beyond "Where can I find this?", you'll know exactly what I'm talking about. 😳 Don't settle for the person who can sort of/maybe put an order in or fumbles through the computer. Otherwise, you may not get what you thought you ordered. If it's their day off, find out when that employee is scheduled and go back to the store that day.
Also, ask to see samples!
How to install a vanity countertop
Some stores run specials in installation. The installation fee is typically around $200. Because we are all about DIY and saving money, I will guide you through the steps of installing it yourself.
Tools you will Need
- adjustable wrench or channel locks (installing and removing plumbing)
- plumber's putty
- pipe tape
- razor knife
- painter's tape
- caulking gun and caulk – I like paintable for the walls
- Someone to help you lift an position
Step By Step Instructions
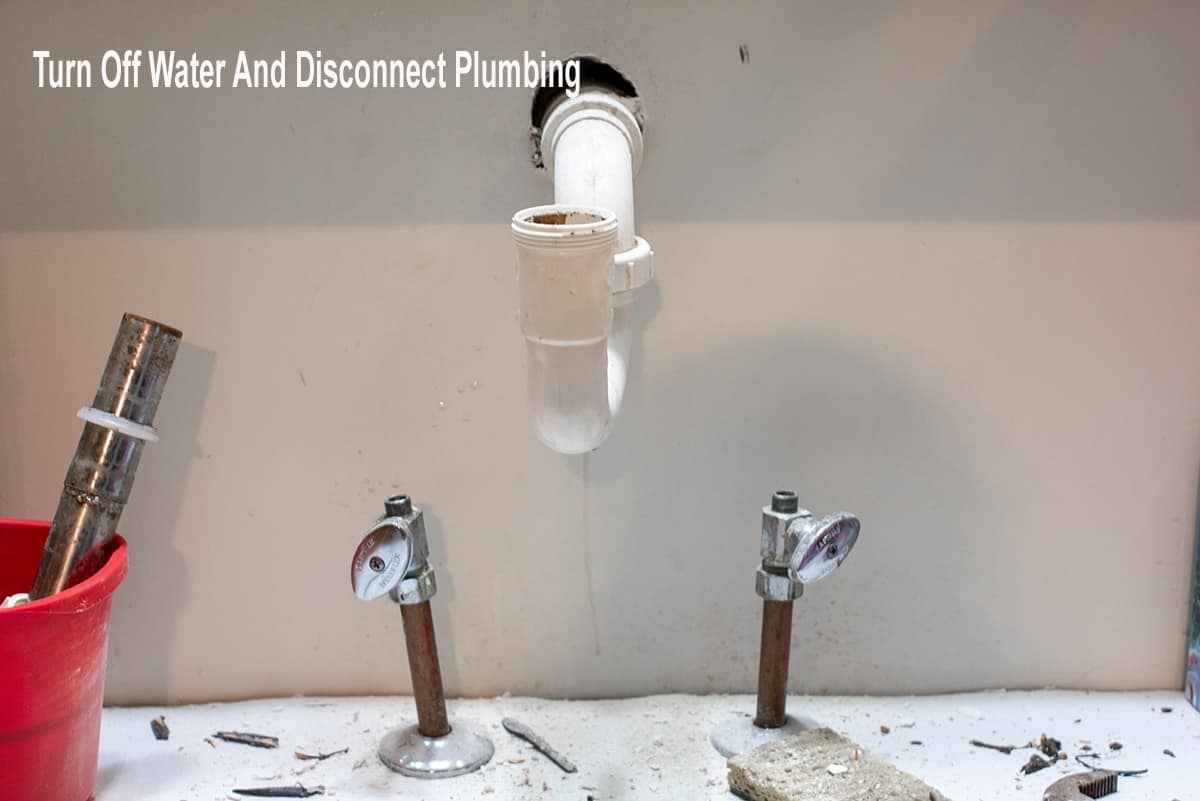
1. Turn off water and unhook all plumbing.
You can turn off the water valves below the sink directly. Be prepared with towels for water in the drain and the sad reality the pipes could use a good cleaning.
2. Remove the existing vanity countertops.
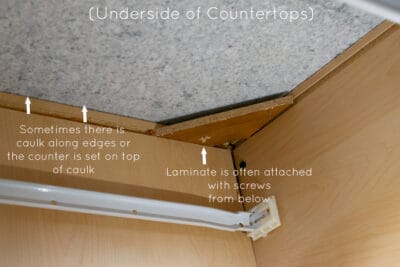
Vanity counter tops, like other counter tops, typically have two ways in which they are attached. Stone or cultured marble are usually just laid on top. A bead of caulk around the frame inside the cabinet keeps them in place. Using a razor-knife, cut through the caulk around and underneath the old countertop. Once this step is complete, you should be able to lift out the old top. Laminate, tile and wood countertops are usually attached by being screwed from underneath. Pull out the drawers at each corner and inspect from inside the cabinet for screws.

3. Position new countertop
Lay the new countertop in position and caulk around the underside as necessary to keep it from shifting.
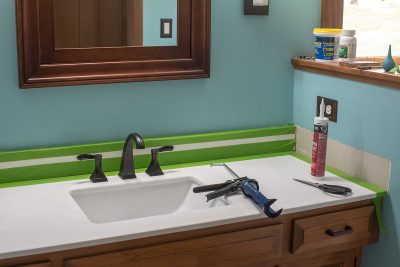
4. Caulk Around Countertop Edge
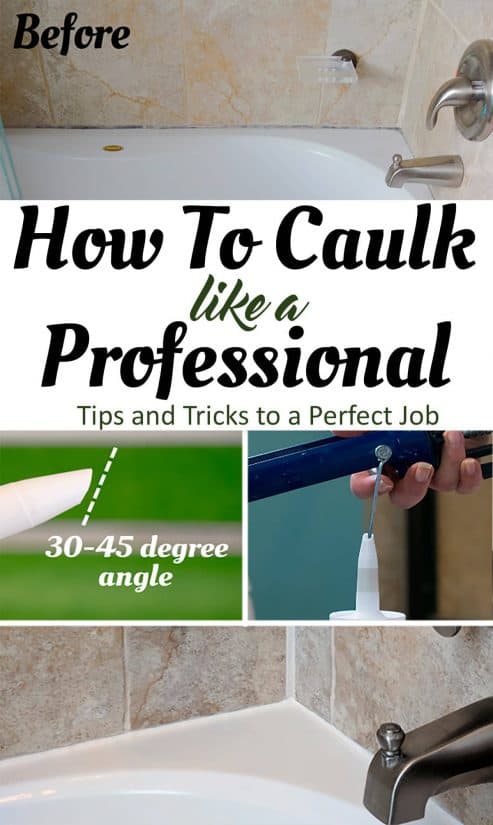
For clean lines, use painters tape to mask off any areas where you don't want the caulk to go. I don't mask off the walls since I can repaint over the caulk for a clean line. For reference, I provide detailed tips in our posts on caulking a bathtub and caulking baseboards.

5. Install faucet and hook up plumbing
It's easier to install the faucet and plumbing after caulking so you don't have to work around these items. Some patching on the walls may be necessary depending how everything lines up. I usually wait about 24 hours to let the caulk dry before installing the faucet. Once this step of install is complete, the faucet and sink are ready for immediate use.

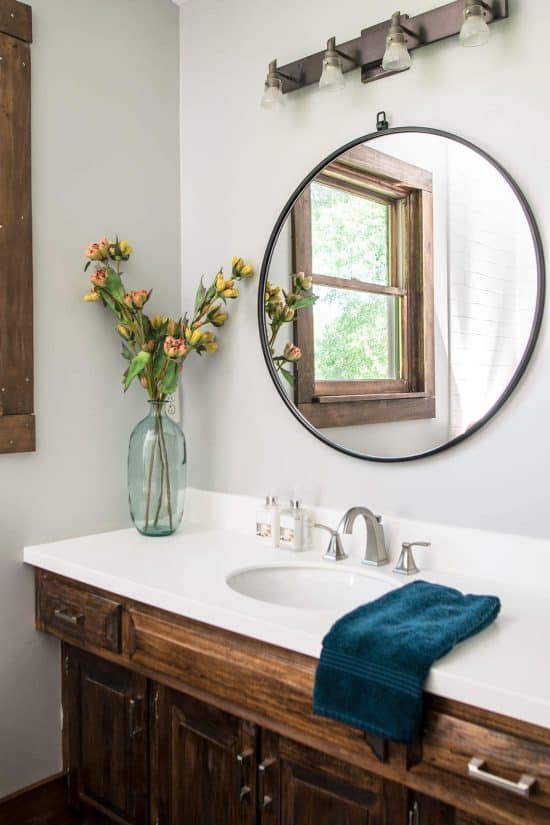
The sleek new modern vanity top is a HUGE improvement. The total cost for this 59 inch vanity was $550 and we paid $90 for the faucet. We had a few customizations (square sink, non-integral bowl, matte finish, 4 inch lip on the back) that upped the cost, but we got a beautiful modern style.
Frequently Asked Questions
How much can I save by installing my own vanity countertop?
Full vanities can easily cost $1000+. Most home improvement stores will offer to remove and install countertops. Depending on the size and whether or not you can find a special, you will save around $200 by installing it yourself and more by not replacing the full vanity.
What is the most durable material for a bathroom vanity countertop?
Granite and stone are not only the most durable options, but also are very appealing when it comes to resale value. Some other materials you might consider if you're wanting to keep your budget as low as possible are quartz, cultured marble, or well sealed butcher block. Keep in mind how much wear and tear your countertop will be exposed to and whether or not those are options are worth the savings.
We are readying this house for sale very soon, and all of the improvements are a little bitter-sweet. Although it is hard to say goodbye to so many childhood memories, it brings me joy to give the home I grew up in the sendoff she deserves.

Sign up below to receive updates including free printables, organization tips, home improvement projects, recipes and more!
Bathroom Makeover Ideas
-
How To Paint A Vanity -
Modern Rustic Remodel -
How To Caulk A Bathtub -

How To Choose A Bathtub
PS I love seeing your creations! Be sure to take a photo and tag#cravingcreative on Instagram! You can alsostay in touch with me through following me on Instagram, Pinterest, and Subscribing to the Newsletter!
-
Channel Locks (installing and removing plumbing)
-
Razor Knife
- Plumber's Putty
- Pipe Tape
- Painter's Tape
- Someone to help you lift and position
-
Turn off water and unhook all plumbing.

-
Remove the old counter top. Stone or cultured marble are usually just laid on top. A bead of caulk around the frame inside the cabinet keeps them in place. Using a razor-knife, cut through the caulk around and underneath the old countertop. Laminate, tile and wood countertops are usually attached by being screwed from underneath.
-
Lay the new countertop in position and caulk around the underside as necessary to keep it from shifting. If you have a separate lip around the top, caulk the backside and press to the wall.
-
Caulk around the counter top edge. For clean lines, use painters tape to mask off any areas where you don't want the caulk to go.
-
Install faucet and hook up plumbing.
Types of Countertops and Design Decisions:
- Countertop Material– Cultured Marble is generally the cheapest, but there are several price grades depending on which type of marble you select. It's very similar to the way kitchen countertops are rated A,B,C,D. Each letter has a different price point.
- Matte or Gloss Finish – Matte finish generally costs around $50 more.
- Type of Faucet- (8 inch wide centerset, 4 inch centerset, single hole, or wall mount)
- Type of sink – Integral (made of the same material as the counter), or Non-integral (they mount a porcelain sink to the underside of the countertop). There is an upcharge for the non-integral, but it's more durable and harder to scratch in my opinion.
- Sink Bowl Shape – square, rectangle, or round.
- Backsplash lip – You can choose between an attached 4-inch lip (pictured in the before photos) or an unattached one (pictured in the after photos). The choice is yours, but if you have walls that aren't parallel with the vanity top, I would recommend an unattached lip. You can hide that flaw much easier. If you're planning to add tile around the vanity, skip the backsplash lip entirely.
- Other customizations – Sometimes, you have the option to choose a specific edge or thicker front to simulate granite.
Reader Interactions
How To Install A Bathroom Vanity Top
Source: https://www.cravingsomecreativity.com/install-replace-vanity-top/


0 Komentar